Showing posts with label cooking. Show all posts
Thursday, February 14, 2013
Silken Chocolate Corn Chip Pie
At a recent potluck, the host (my lovely friend at Green Door Hospitality) requested all the guests bring a sweet dish. She provided the savory dishes.
My mother-in-law makes a silken tofu pie that's really delicious; made with just a few ingredients, it's surprisingly rich and satisfying. I've also had vegan chocolate pudding at a couple of potlucks, and liked it a lot.
I knew there would be at least one vegan at the party, so I wanted to make something she could eat. Then I remembered another friend is gluten-free, and I wanted to make something for her too.
So instead of my usual graham-cracker crust, I tried something new: a tortilla chip crust. I looked for recipes online, but didn't find any. So I ended up crushing up the chips finely in my food processor and adding sugar, coconut oil, and a bit of water to bind it. When the texture looked sandy, I pressed it into a pie plate and baked it until golden, about 15 minutes.
While it cooled, I made the chocolate filling. It's a deliciously creamy mixture of melted dark chocolate, silken tofu, vanilla extract, maple syrup, and salt.
The tofu really thickens the whole thing up and makes it very much like a chocolate-mousse pie.
I was surprised and really happy with how well it turned out. The salty corn chip crust went really well with the chocolate, and it didn't get bogged down by the mousse.
Definitely delicious.
Here's the recipe:
Chocolate Tortilla Chip pie
Crust:
2 cups finely ground tortilla chips
1/4 cup melted coconut oil
1 tablespoon sugar
Filling:
2 cups good-quality dark chocolate chips
One package silken tofu (my package was 16 oz, but many are smaller)
3 to 4 tablespoons maple syrup
1 teaspoon vanilla extract
1/2 teaspoon salt
Preheat the oven to 350 degrees. Oil a 9-inch pie plate. Put all the ingredients for the crust into the food processor and pulse until well combined. Add water and pulse until the mixture just comes together. Press the mixture into the pie plate and bake for about 15 minutes, until slightly golden. Cool completely.
Wash the bowl of the food processor before making the filling. In a large glass bowl, melt the chocolate chips in the microwave in 30-second bursts on half-power, stirring after each burst. Put the tofu in the food processor and process until very smooth. Add the maple syrup, vanilla, and salt and pulse to combine. Add the melted chocolate and puree until smooth.
Pour the filling into the cooled crust. Chill in the fridge for 2 hours before serving.
Labels:
austin,
baking,
chocolate,
cooking,
gluten-free,
potluck,
vegan,
vegetarian
Wednesday, January 16, 2013
Miso-Glazed Brussels Sprouts
Oh man, I love Brussels sprouts. Even as a child, they were
one of my favorite vegetables. My mom used to get the frozen ones that comes
packed in a butter sauce, and eventually switched to growing them in her large backyard garden. I had never seen anything like the giant stalks with the little sprouts popping out all over them.
Now they’re super trendy on restaurant menus in Austin. I’ve been
enjoying them at East Side King (at the Liberty), and at Uchiko for quite a
while, just to mention two places. And their preparations are much more piquant than the simple
roasted-with-butter one I usually make at home.
Today, I tried something new, a piquant Brussels sprouts recipe of my own. With a bunch of ingredients I
had on hand, I whipped up a quick sauce that I glazed the panfried sprouts
with.
Holy cow, they were good. The sharp sauce was a great complement to the strong flavor of the vegetable. The Brussels
sprouts came through all earthy and sweet, and the sweet-sour-salty-spicy glaze
matched it perfectly.
Miso-Glazed Brussels Sprouts
2 teaspoons white miso (this is really mild)
1 Tablespoon soy sauce
1 T. brown sugar
¼ teaspoon red chili flakes
Juice of half a lemon
1 Tablespoon sunflower or safflower oil
1 pint Brussels sprouts, ends trimmed, halved
Whisk together the miso, soy sauce, brown sugar, chili
flakes, and lemon juice. Set aside.
Heat the oil in a frying pan over medium-high heat. Add the Brussels
sprouts. Try to get them cut-side down, to help maximize the browning of the
cut inner leaves. After about 3 minutes, flip one over and check for browning.
If it’s well browned, from the center to the outer edges, stir and keep frying
for another 5 minutes, stirring occasionally until they’re just beginning to
get tender. If it’s not yet browned all the way across the cut side of the
sprouts, keep cooking for another minutes before beginning to stir.
Turn the heat off and pour the miso mixture over the Brussels
sprouts. Stir to coat and serve.
Sunday, January 13, 2013
Carrot Tarragon Soup
This weekend's downtown farmers market was small. All the venders lined just one street, and I was a little worried there wouldn't be much to be found.
I was glad to be wrong. There were plenty of folks with fresh fruit and veggies. I got a beautiful bunch of carrots from Bar W Farm, and couldn't wait to use them.
Coconut, to me, is one of those foods that can make almost anything delicious. The creamy, tropical flavor is one of my favorites. And I thought it'd go really well with the sweet, juicy carrots.
Lick Ice Creams, in South Austin, has a carrot-tarragon flavor that I adore. It's sweet and a little herbal, and really nice and creamy. That inspired me to try tarragon in my soup.
Though it used only a handful of ingredients, the soup was a success. It was earthy and creamy, with the delicate anise flavor from the tarragon shining through. Next time, I think I may try orange or tangerine juice in place of the lemon, just to switch things up.
Carrot Tarragon Soup
1 can coconut milk (the full-fat stuff)
2 Tablespoons roughly chopped tarragon, divided
1 Tablespoon sunflower or safflower oil
1 pound carrots
2 cups vegetable stock
Juice and zest of half a lemon
Salt, to taste
In a small pot, combine the coconut milk with 1 tablespoon of the tarragon. Cook over low heat, stirring occasionally, until it begins to simmer. Turn the heat to very low and continue cooking, stirring occasionally, for 15 minutes. Turn the heat off and let the tarragon steep in the milk.
Meanwhile, chop the carrots in bite-size pieces. (This is just to increase the surface area of the carrots. They'll be pureed at the end, so don't worry about them being attractive.) In a large saucepan, heat the oil over high heat. Add the carrots and a pinch of salt and cook until they're beginning to brown, about 10 minutes.
Add the vegetable stock to the carrots, and simmer until the carrots are tender, about 10 minutes. Pour in the coconut milk, add the remaining tarragon, and stir to combine. Turn off the heat and puree the soup with an immersion blender. Stir in the lemon juice and zest and serve.
Labels:
coconut,
coconut milk,
cooking,
recipe,
soup,
tarragon,
vegan,
vegetarian
Monday, December 10, 2012
Oven-Roasted Broccoli
We watched an old episode of Good Eats the other day. The show focused on broccoli, one of my favorite vegetables.
Broccoli season has arrived in Austin, and I got a huge two-pound crown from Harvest Time Farm Stand at the farmers market on Saturday morning.
Alton Brown's recipe for Oven Roasted Broccoli looked wonderful. I roast broccoli a lot at home, and we usually eat it dressed with just olive oil, salt, and chili flakes. This recipe has toasted bread crumbs and cheese, making it heartier and good for the cold snap that just came in.
I made the recipe with a few modifications. There was no panko in our pantry, so I made fresh bread crumbs in the food processor and toasted them in the oven. I also added lemon zest and juice to the finished recipe. Then each bowl got topped with a fried egg and a few roasted tomatoes.
It turned out really well. The broccoli was still a bit crunchy, and the bread crumbs and cheese gave it a deep nutty flavor. The original recipe calls for either Cheddar or Parmesan. I used Cheddar, but I think I'll try Parmesan next time. The Cheddar, while delicious, didn't get distributed evenly in the broccoli, gathering in chunks. Don't get me wrong; the clumps were salty, crunchy, and delicious. But I think the Parmesan may coat the broccoli more evenly.
Tuesday, September 25, 2012
Roasted Baby Eggplant
![]() |
| Cute little things. |
But when I saw these sweet baby eggplants at the farmers market, I had to try them.
Roasting is always a good option when I prepare eggplant. It's super simple and it brings out the natural succulence of the eggplant, making it sweet and juicy.

Here's how I made them:
1. Cut the eggplants in half lengthwise.
2. Toss them in a big bowl with salt, pepper, and olive oil.
3. Bake them at 375 for about 30 minutes.
4. Eat with your fingers. (It's hard not to, really.)
Thursday, August 16, 2012
Delicata Tart
I had several delicata squash on the counter, and some really nice butter in the fridge, so it seemed like the perfect time to make a squash tart.
Delicata squash are beautifully striped and mildly nutty in flavor. They're similar in taste to butternut or acorn squash, and take very well to roasting. Here's what they look like when you roast them and take a scoop out of one to taste it:
We cook a lot at home, and I couldn't believe the effort-to-deliciousness ratio in this dish. It was super-easy to make, and I did it all with ingredients I had on hand. The old man and I ate it for dinner, then for breakfast the next morning with scrambled eggs and green-chile yogurt sauce. I took it to the office and ate it cold for lunch. All good. All very good.
Here's what I did:
After roasting three medium squashes, I removed all their flesh and mashed it with my hands. (Yes, that happened. I forgot the potato masher had broken, strangely enough, and the fork was just too slow.) Then I mixed in two small onions that I'd caramelized in butter, one farm egg, a good handful of grated Parmesan, a few big spoonfuls of Greek yogurt, and salt and pepper.
I prepared a butter-rich tart dough, pressed it into the pan, and baked it.
| Before |
| And after |
Then I crumbled a few ounces of blue cheese in the baked tart shell, spread the filling on and baked it until set.
Then I went nuts waiting for the thing to cool. But man, it was worth it. The crust had a wonderfully nutty brown-butter flavor, which went perfectly with the sweet squash. And the piquant blue cheese added really good saltiness.
Delicata Squash Tart
1 recipe tart dough
3 delicata squash
1 tsp. vegetable oil
2 T. butter
2 small onions, thinly sliced
1 oz. Parmesan, finely grated
1/3 c. Greek yogurt
1 egg
Salt and pepper
3 oz. blue cheese
Prepare and bake the tart dough. Set aside to cool completely.
Preheat the oven to 375. Slice the squash in half and scoop out the seeds with a spoon. (You can bake them like pumpkin seeds, or discard them.) Rub the oil on the cut sides of the squash, and place face-down on a baking sheet. Bake until easily pierced with a fork, about 30 minutes.Remove from the oven, but leave the oven on.When cool enough to handle, scoop the flesh from the skins into a medium mixing bowl and mash until mostly smooth.
While the squash is roasting, caramelize the onions: melt the butter in a large, nonstick skillet over medium-low heat. Add the onions and cook until well browned, stirring often (this can take 30 minutes or more, but the flavor is worth it).
Add the onions to the squash, then stir in the Parmesan, yogurt, egg, and salt and pepper to taste. Crumble the blue cheese into the bottom of the tart shell, then spoon and spread the squash mixture over it.
Bake in the center of the oven until set, about 35 minutes. Cool for 10 minutes, slice, and serve.
Tuesday, July 10, 2012
Guajillo Sauce Cooking: Baked Tofu
We eat a lot of tofu in this house. Most often, it's pan-fried or baked. I love the flavor and texture of fresh tofu, but baking it makes it much chewier and denser; it really transforms it. If there's sugar in the sauce, it caramelizes in the oven, providing a rich, deep flavor.
So that double recipe I made of guajillo sauce I made? It turned out to be a whole lot of sauce: four pint-size jars full. Its tangy, spicy, sweet flavor made it a perfect candidate for a baked tofu glaze.
To make it, I sliced one 12 ounce package of extra-firm tofu. The stuff I get, made by White Wave, is very dense, so it can be sliced thinly. Then I coated the tofu in a mixture of a half-pint of guajillo sauce mixed with a tablespoon of sriracha. (I like my baked tofu spicy.) After baking for 20 minutes at 325 degrees, I flipped the slices over and baked them for another half hour.
Normally, I bake tofu at a higher temperature (375 or 400 degrees), but I was baking something else that required a lower temperature. At the higher temperature, check the tofu after 15 minutes to ensure it doesn't burn. Flip it, then bake for another 15 minutes, or until the sauce adheres to the tofu and it's beginning to brown.
The tofu is usually more browned after baking, but the low oven temperature prevented it from going too far. It was still delicious, both on sandwiches, and as a snack on its own.
So that double recipe I made of guajillo sauce I made? It turned out to be a whole lot of sauce: four pint-size jars full. Its tangy, spicy, sweet flavor made it a perfect candidate for a baked tofu glaze.
| Baked and ready to go |
To make it, I sliced one 12 ounce package of extra-firm tofu. The stuff I get, made by White Wave, is very dense, so it can be sliced thinly. Then I coated the tofu in a mixture of a half-pint of guajillo sauce mixed with a tablespoon of sriracha. (I like my baked tofu spicy.) After baking for 20 minutes at 325 degrees, I flipped the slices over and baked them for another half hour.
Normally, I bake tofu at a higher temperature (375 or 400 degrees), but I was baking something else that required a lower temperature. At the higher temperature, check the tofu after 15 minutes to ensure it doesn't burn. Flip it, then bake for another 15 minutes, or until the sauce adheres to the tofu and it's beginning to brown.
| Sliced tofu and sauce |
| Tofu coated with sauce |
The tofu is usually more browned after baking, but the low oven temperature prevented it from going too far. It was still delicious, both on sandwiches, and as a snack on its own.
Tuesday, June 26, 2012
A Chilaquiles Jones
For our anniversary, my mom got me and M. a gift certificate to Frontera Grill. We went with my mom and aunt one Saturday for brunch, after buying berries and pastries at the Green City Market in Lincoln Park.
![]() | ||
| Frontera chilaquiles with guajillo sauce. And really good coffee. |
I'd had chilaquiles on the brain for weeks, and M. told me I had a chiliquiles jones. He was right: when I saw it on the menu I knew I had to have it. The guajillo sauce was sharp, a little spicy, a tiny bit bitter, and all delicious. The substantial chips were made from the housemade thick tortillas, so they still had some bite despite being drowned in the delicious sauce.
After getting home, I had to make a batch of my own. I found a recipe on Epicurious, which I followed with a couple of exceptions. I used chipotle powder in place of the paprika, and I doubled it, so it cooked longer.
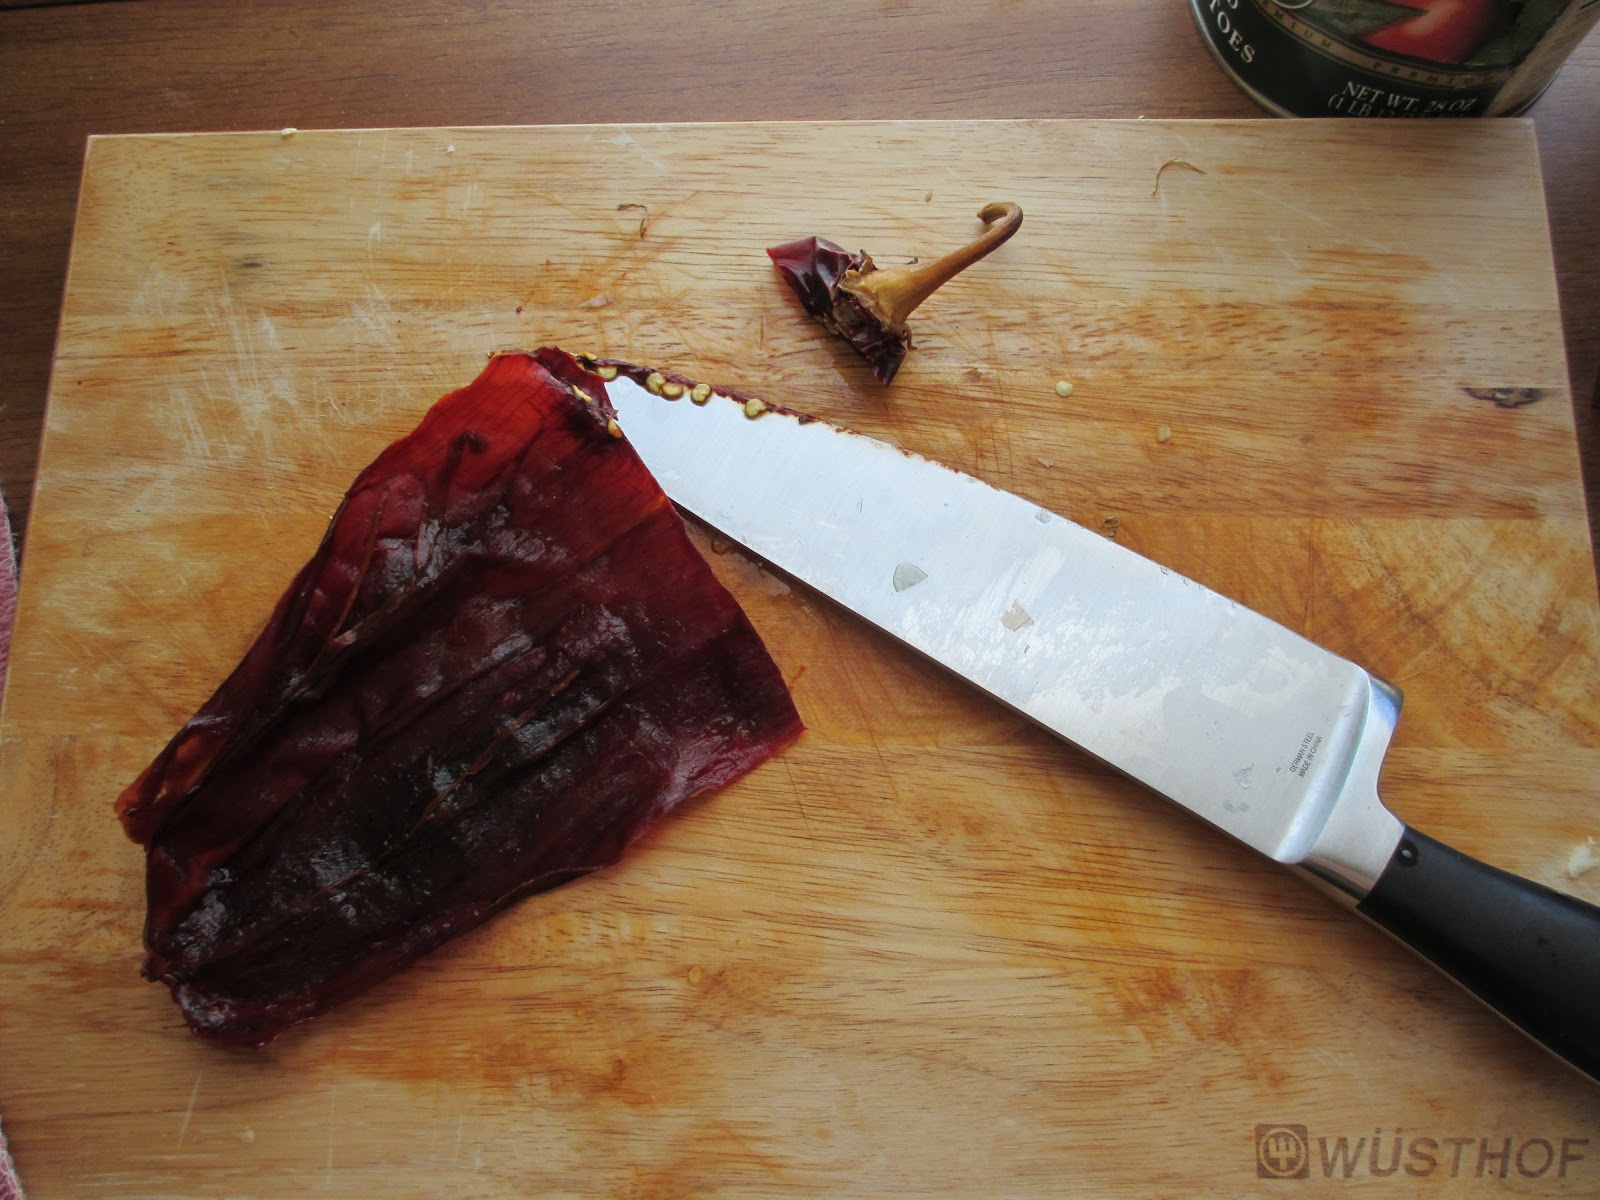
It was pretty easy to make. I soaked a package of guajillo chilies in hot water until they were soft, then roughly chopped jalapenos, onions, and garlic. After removing the stems and seeds from the chilies, I blended everything with drained whole tomatoes and some of the soaking liquid, and cooked it for about 40 minutes. The heat level was still pretty low, so I added some more chipotle and cooked it a little more along with the honey.
| Homemade chilaquiles |
I tossed some of the sauce with store-bought tortillas and topped it with some crumbled feta (instead of queso fresco), then baked it until the chips were browned.
With some chopped sweet Texas 1015 onions, lime juice, and avocado, it was satisfying, but pretty different from Frontera's version. This one was more tomato-y and less spicy and complex. Next time, I think I'll try a mixture of dried chilies and toast them before soaking, and reduce the amount of tomato.
I'd assumed the sauce would cook down a bit, which is why I made the double batch. I ended up with four pints, which was a bit more than expected. I'll be making this again soon.
Onions: Milagro Farm
Jalapenos: Urban Roots
Garlic: Buena Tierra Farm
Thursday, October 8, 2009
Project: Stuffed Poblanos
I've always loved stuffed peppers. My grandma's version used green bells stuffed with rice and rich tomato sauce. They were pretty tasty, but I prefer a spicier Latin-inspired poblano relleno to a standard stuffed bell pepper.
I've made chiles rellenos before, stuffing charred and peeled poblanos with cheese, then breading and frying them. They're always delicious, but after having an un-fried version at La Fonda in San Antonio, I wanted to try making them myself.
I found some gorgeous poblanos, which I charred, peeled and seeded.
I used one to make a poblano cream sauce, and stuffed the remaining two with a mixture of quinoa, raisins, pine nuts and a veggie mixture of sweet potato, corn onion and purple cabbage.
I put a little bit of the poblano cream into the bottom of a pan, and placed the stuffed poblanos in it, then covered them with more sauce and some nutty-sharp Cheddar cheese and baked them until everything was hot and melty.
We ate them with quinoa with raisins and pine nuts and black beans.
I am really happy with how well the poblanos turned out. The texture was fantastic, still a little firm, and I think I prefer this non-fried version to the battered one. It's much lighter, and the flavor of the poblano comes through a lot better. Plus, it's not fried, so you get to save a little on fat and calories.
I think that, with fall coming, I'm going to make these again and experiment with fillings. Maybe butternut squash and black beans?
The poblano cream sauce was delicious, and really easy, too. It's kind of based on a Rick Bayless recipe from Mexican Kitchen, but it's a lot lighter. I had a funny kitchen moment when making it, though. I used all low-fat milk and no cream, but when I blended the milk in the food processor, it aerated and puffed up like whipped cream! It deflated once I added it to the hot pan, but just over cup of milk filled the bowl of the food processor.
Poblano Cream
1 large poblano, charred, peeled and seeded
1 1/4 cup milk
1 Tablespoon flour
1 Tablespoon butter
1/2 cup Greek yogurt (you could use crema, but this is what I had)
salt and pepper
Blend the poblano and 1 cup of milk in a blender or food processor.
In a small saucepan, melt the butter and add flour. Cook over medium heat until it begins to take on a little color. Whisk in the milk mixture, along with the remaining milk. Bring to a simmer. Add Greek yogurt, salt and pepper. Heat through.
Wednesday, September 16, 2009
My Kolaches. Let Me Show You Them.
I hadn't heard of kolaches before moving to Austin three years ago. In Chicago, Polish kolackys (pronounced ko-lach-keys) were popular, but are really more of a cookie than a bread.
I've really liked the kolaches I've gotten at Lone Star Kolaches on Lamar, but I wanted to try them on my own.
I searched the webs for a recipe that looked tasty, and settled on one from the Homesick Texan blog, which I modified to suit my needs.
After gathering all my ingredients, I settled into the kitchen and started my dough.
First, I fed the yeast with sugar, flour and milk. After a little rest, the dough had puffed up.
I mixed in butter and eggs, and then the flour. A lot of flour. I'm not even kidding; I used a lot of flour. The recipe called for 2 cups, but I ended up using closer to 3 after I turned out the 2-cup dough and it oozed over the side of the board I was working on. It had been raining for several days, so I think I can attribute a lot of that to the moisture in the air, and probably my flour. But I was a little surprised at just how I much I had to use.
After another rise, I started filling the dough. Going kind of traditional, I used a veggie sausage and pickled jalapenos in one type and extra-sharp Cheddar and jalapenos in another. I filled the leftover dough with cherry preserves.
After buttering and another rise, I baked them. I had to go a bit longer than the recipe suggested, baking for 20 minutes instead of 12-15.
Seeing my nicely browned kolaches come out of the oven, hot and steamy, was really satisfying. I don't bake a lot, but I really want to do it more. I think I found yeast breads kind of intimidating, but really, they're easy. There's just a lot of waiting.
Kolaches
1 packet dry active yeast
1 cup warm milk
1/4 cup sugar
3 3/4 cups all-purpose flour
3/4 cup melted butter
2 eggs, beaten
1 teaspoon salt
Mix the yeast, milk, sugar and 1 cup of the flour in a large bowl. Cover with a towel and let rise until doubled in size (about an hour).
Add the eggs, butter and salt. Mix until well-combined, and add the flour, 1/2 cup at a time. The dough should be moist and supple, but not oozey. If you've got a good dough (it's sticking to itself more than to your hands), you can stop before the reaching the 3 3/4 cup mark.
Knead on a floured board for about 10 minutes. Put in a large, buttered bowl and cover. Let rise for an hour.
Butter a baking sheet. Punch down the dough, and begin filling: Pull off small balls of dough and pat or roll out into 3-inch discs. If filling with sausage or cheese, place in the middle of the disc and fold the sides over. Place seam-side down on a baking sheet. If using fruit preserves, use your finger to make a little well in the center of the disc. Place on the baking sheet and fill the well with about a teaspoon of fruit preserves.
Brush the tops of the kolaches with melted butter. Cover and let rise for 1/2 hour. Bake at 375 for 15-20 minutes, or until golden brown all over.
Thursday, July 30, 2009
Melon Soup
One of the things I really dislike about the summer in Austin is the heat. It's oppressive, and it feels like it's never going to end.
One of the things I love about the summer in Austin is the fruit. I look forward to melon season all spring long.
This year, one of the first farms to have melon at the Sunset Valley market was Buena Tierra.
Fresh melon is crisp and cooling, and I don't think I've ever had melon as delicious as the melon I've gotten here in Texas. Maybe it's the heat?
I've also had melons I hadn't heard of before moving here, my favorite of which is the galia. It's kind of canteloupey, kind of honeydewy, and all delicious.
And during these really hot days, a chilled melon soup is simple to make, requires no cooking and is really cooling to eat.
Melon Soup
One melon, preferably galia
1-2 cups vanilla-flavored yogurt, depending on the size of the melon
Juice of 1 lime
2 Tablespoons agave nectar
1/2 inch ginger, grated
1 Tablespoons chopped fresh mint leaves
1/2 teaspoon salt
Cut the melon in half, and scoop out and discard the seeds. Scoop the flesh into the bowl of a food processor. Add yogurt, starting with 1 cup. Add the rest of the ingredients, and more yogurt to taste.
Instead of croutons, I like to crush ginger snaps on top.
One of the things I love about the summer in Austin is the fruit. I look forward to melon season all spring long.
This year, one of the first farms to have melon at the Sunset Valley market was Buena Tierra.
Fresh melon is crisp and cooling, and I don't think I've ever had melon as delicious as the melon I've gotten here in Texas. Maybe it's the heat?
I've also had melons I hadn't heard of before moving here, my favorite of which is the galia. It's kind of canteloupey, kind of honeydewy, and all delicious.
And during these really hot days, a chilled melon soup is simple to make, requires no cooking and is really cooling to eat.
Melon Soup
One melon, preferably galia
1-2 cups vanilla-flavored yogurt, depending on the size of the melon
Juice of 1 lime
2 Tablespoons agave nectar
1/2 inch ginger, grated
1 Tablespoons chopped fresh mint leaves
1/2 teaspoon salt
Cut the melon in half, and scoop out and discard the seeds. Scoop the flesh into the bowl of a food processor. Add yogurt, starting with 1 cup. Add the rest of the ingredients, and more yogurt to taste.
Instead of croutons, I like to crush ginger snaps on top.
Monday, June 22, 2009
Okra Stew with Black-Eyed Peas
I brought this stew to a potluck dinner Friday night. With gorgeous okra from Finca Pura Vida, I thought an okra stew would be a nice, summery dish.
French Quarter Stew
3 Anaheim chiles, chopped
1 small onion, chopped
2 teaspoons safflower oil
2 cloves garlic, chopped
1 28-oz can diced tomatoes
1 teaspoon tomato paste
1 15-oz can black-eyed peas, rinsed and drained
3/4 pound fresh okra
1/2 cup water
salt and pepper
Heat safflower oil in a large pot. Add the onion and chiles with a little salt and pepper and cook until soft, about 5 minutes. Add the garlic, and cook until beginning to soften, about a minute more
Add the tomatoes and tomato paste, and season with more salt and pepper. Simmer until the tomatoes begin to break down, about 10 minutes. Add black-eyed peas.
Cut okra into 1-inch pieces, discarding the stem ends. Add to the pot with the water. Cover and simmer over low heat until okra is tender-crisp, about 15 minutes. Serve over rice.
The chiles were much hotter than I'd expected, and much hotter than other Anaheims I've had this season, so I didn't have to add any more heat (I'd planned to use jalapenos). A little Sriracha on top would do, too.
3 Anaheim chiles, chopped
1 small onion, chopped
2 teaspoons safflower oil
2 cloves garlic, chopped
1 28-oz can diced tomatoes
1 teaspoon tomato paste
1 15-oz can black-eyed peas, rinsed and drained
3/4 pound fresh okra
1/2 cup water
salt and pepper
Heat safflower oil in a large pot. Add the onion and chiles with a little salt and pepper and cook until soft, about 5 minutes. Add the garlic, and cook until beginning to soften, about a minute more
Add the tomatoes and tomato paste, and season with more salt and pepper. Simmer until the tomatoes begin to break down, about 10 minutes. Add black-eyed peas.
Cut okra into 1-inch pieces, discarding the stem ends. Add to the pot with the water. Cover and simmer over low heat until okra is tender-crisp, about 15 minutes. Serve over rice.
The chiles were much hotter than I'd expected, and much hotter than other Anaheims I've had this season, so I didn't have to add any more heat (I'd planned to use jalapenos). A little Sriracha on top would do, too.
Wednesday, May 27, 2009
Beans!
I have a confession to make: I am a dried-bean novice.
And I eat a lot of beans. After being vegetarian for about 15 years, I have only used lentils in their dried state. (Do lentils even count? They take no time.) Other beans just seemed like too much work.
I've been satisfied with canned beans—they're a great convenience food and really good for you. It's so simple to just open a can, rinse the beans, and add them to a recipe or salad.
While shopping last weekend, I finally decided to take the plunge and make dried beans instead of canned. I chose black beans, because they're one of my favorites and I could imagine using a whole batch in just a few days.
I was getting ready to soak the beans before going to bed Monday night. Just for good measure, I checked with the old standby, The Joy of Cooking, which suggested that black beans don't need to be soaked at all. Apparently, soaking them only eliminates a tiny portion of the gas-causing sugars.
So I went to bed and left the bean-making for yesterday.
After picking over and rinsing the beans, I just boiled them with a chopped onion and jalapeno, adding salt and pepper when they were almost done.
And the results?
Holy crap! My black beans are actually black! I've always hated how my black beans turn out brown after I cook them out of a can with other ingredients. Seeing perfectly black black beans in restaurants was frustrating.
Who knew all it would take was a super-simple method of cooking dried beans? OK, probably a lot of people, but whoa—I am so happy with these. They're prettier, have a firmer bite and taste better than their canned counterparts.
The only sad thing is that the process stained my favorite pot. It's enameled cast-iron, and its creamy interior has been stained before. I think the blue-black ring should come out with further cooking or a good baking soda scrubbing.

I am definitely going to be using dried beans more often. They're much easier to use than I thought, not to mention delicious.
And I eat a lot of beans. After being vegetarian for about 15 years, I have only used lentils in their dried state. (Do lentils even count? They take no time.) Other beans just seemed like too much work.
I've been satisfied with canned beans—they're a great convenience food and really good for you. It's so simple to just open a can, rinse the beans, and add them to a recipe or salad.
While shopping last weekend, I finally decided to take the plunge and make dried beans instead of canned. I chose black beans, because they're one of my favorites and I could imagine using a whole batch in just a few days.
I was getting ready to soak the beans before going to bed Monday night. Just for good measure, I checked with the old standby, The Joy of Cooking, which suggested that black beans don't need to be soaked at all. Apparently, soaking them only eliminates a tiny portion of the gas-causing sugars.
So I went to bed and left the bean-making for yesterday.
After picking over and rinsing the beans, I just boiled them with a chopped onion and jalapeno, adding salt and pepper when they were almost done.
And the results?
Who knew all it would take was a super-simple method of cooking dried beans? OK, probably a lot of people, but whoa—I am so happy with these. They're prettier, have a firmer bite and taste better than their canned counterparts.
The only sad thing is that the process stained my favorite pot. It's enameled cast-iron, and its creamy interior has been stained before. I think the blue-black ring should come out with further cooking or a good baking soda scrubbing.
Friday, May 22, 2009
Shortcut
(((This is a blog about cooking and eating in Austin, Texas (where I live), and wherever else I go.)))
Sometimes shortcut ingredients can be lifesavers. Or, at least dinnersavers.
I had a pack of White Wave Garlic and Herb Baked Tofu in the fridge. It's not something I normally buy, but decided to give it a try after finding it on sale.
With a giant head of red-leaf lettuce in the crisper, the tofu made a nice addition to a salad, providing flavor, texture and protein.
After adding a few sliced olives, dried cranberries and toasted almonds, dinner was prepared in under 10 minutes.
Yum.
Sometimes shortcut ingredients can be lifesavers. Or, at least dinnersavers.
I had a pack of White Wave Garlic and Herb Baked Tofu in the fridge. It's not something I normally buy, but decided to give it a try after finding it on sale.
After adding a few sliced olives, dried cranberries and toasted almonds, dinner was prepared in under 10 minutes.
Wednesday, May 20, 2009
Ugly Soup
I get on these food kicks (don't call it a rut!), and lately I've been making lots of soup. For some reason, when the weather got to 90 and stayed there, I couldn't get enough of the stuff.
My most-made soup the last several weeks is one I call Ugly Soup. It's kind of like a Vietnamese-style hot and sour soup, spicy with chiles and sour with lime juice.
It's delicious, and pretty good for you. But it's ugly. Really ugly.
It's got a whole head of shredded cabbage boiled in it, and that stuff just ain't pretty. But boy, is it tasty! I put a little fresh cilantro on top to dress is up a little, but it's clearly drab. The cabbage is light - almost grey, and tofu looks like, well, tofu - beige and square.
Tomatoes and pineapple make it more tart and fresh-tasting, and the color from the tomatoes helps a bit, too.
I could probably make this stuff a couple times a month and still not get sick of it. Even in the heat, it's light and fresh and feels nourishing to eat. The hot, sour and slightly sweet broth is irresistible, and I love the slight crunch of the cabbage.
Friday, May 8, 2009
Cauliflower Soup: Better with Air Conditioning
There are so many good veggies at the market now. I got an incredibly gorgeous golden cauliflower recently at Sunset Valley.
My usual method of cooking cauliflower is roasting - I find it really brings out the flavor without having to add much of anything else, except for a little bit of butter and salt.
I've been eating a lot of soup lately, so I tried a creamy cauliflower version.
To start, I chopped the cauliflower and roasted it until it was golden brown.
As it was roasting, the house got hotter and hotter. That's not so unusual, but the air conditioning was on. I checked the vents, and air was coming out, but it wasn't cold. Uh oh. Now, I had roasting vegetables and I had to eat a bowl of hot soup pretty soon.
I added the cauliflower to a pot of sauteed carrot, onion potato and vegetable broth and boiled it all together for a few minutes.
I added fresh milk and parsley and whirred it with a hand blender until it was smooth-ish (I like some texture).
The result was delicious, and really pretty. I love the pale orange color. I'd thought about adding some Full Quiver Cheddar for sharpness, but I forgot. (I blame the heat.) It was good, even without the cheese, but I may try it next time.
Eating hot soup in a hot house is not the most comfortable thing in the world, but when the soup turns out really well, it isn't all that bad.
I've been eating a lot of soup lately, so I tried a creamy cauliflower version.
To start, I chopped the cauliflower and roasted it until it was golden brown.
I added the cauliflower to a pot of sauteed carrot, onion potato and vegetable broth and boiled it all together for a few minutes.
I added fresh milk and parsley and whirred it with a hand blender until it was smooth-ish (I like some texture).
Eating hot soup in a hot house is not the most comfortable thing in the world, but when the soup turns out really well, it isn't all that bad.
Subscribe to:
Posts (Atom)